The RV Shop

How To Use Your Camera

Tuesday, October 26, 2010

Trailer Life Repair and Maintenance Manual

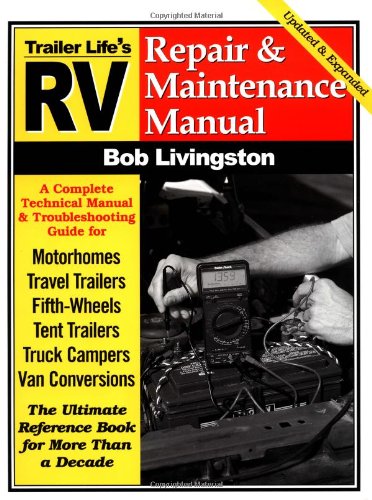
RV Repair and Maintenance Manual:
Updated and Expanded 


I own this book. Mine is dog eared and well worn from use and I need a new one. It is the first place I go when I need to work on any of the components of my rig.  If I want info about my water heater it is available here. Solar Panels its in there, problems with batteries? Get help hear. Now and then some of the information is a little brief, but overall there is no other resource that provides as much help and detail as you cane find here.
GET YOURS NOW, and start SAVING MONEY on repairs and maintenance you can do yourself.


RV Repair and Maintenance Manual is the most popular resource for owners who prefer to work on their own RVs. The book features step-by-step procedures for maintaining and repairing RVs, presented in easy-to-understand layman's terms and simple-to-follow instructions. The fourth edition has been updated and expanded to keep up with the latest in RV technology and repair procedures. From trouble-shooting guidelines to quick diagnoses and repairs, this manual will keep you rolling down the highway and not in the repair shop. Packed with valuable information, checklists, photos, and charts, the RV Repair and Maintenance Manual includes topics on electrical systems, LP-gas systems, water systems, sanitation systems, AC generators, heating systems, air-conditioning systems, refrigerators, trailer brakes, trailer suspensions, dinghy towing, hitches, drivetrain systems, solar power systems, ovens and ranges, microwaves and ice makers, exterior and interior care, and accessories.


Sunday, October 24, 2010

RV Tips - Too Much Inside Moisture

Well we survived the first storm of the season with total success. No leaks! TV works, Internet works, Yippee!
One thing that we need to prepare for though is condensation. The weather will be getting colder now, the humidity will be higher from rain and from inside activities like cooking, showers and so on. You know you have too much moisture when you see it steaming up your windows and it doesn't go away.

One thing we do is remove all the screens from all the windows. It seems that the screens block air from circulating near the glass and evaporating the moisture building up through condensation. We also make sure that nothing is against any of the outside walls. Especially those where circulation is limited. This can be behind the couch, in the bedroom closet against the outside wall, and behind the head of the bed which is also against the outside wall of the slideout. It can be difficult to keep clothes from being moved against the closet wall so we store a folding clothes drying rack there. This provides an air gap that will allow air circulation in that area.

When we find moisture building up, we will open a few windows and the ceiling vents too. Turning the fan on over the stove helps when cooking. We have two of the four ceiling vents covered with vent covers that allow them to be opened during wet weather. One is over the bathroom and has an exhaust fan. We open this and turn the fan on during showers to help keep the moisture out. When it's not raining too hard we use the Fantastic Vent. Ours is supposed to close when it rains but that feature hasn't worked on ours yet.

Outside air is usually dryer, even when its raining, than inside air so opening a couple of windows and turning on a vent fan can be a really good idea when it's practical.

Here's another tip from some RV friends of ours for keeping your windows clear. Give them a thin coating of dish soap. It will keep the moisture away and make it easier to clean them next time you need to wash your windows. I wrote a post about this earlier if you want to find out more about how I learned about it.

I recently came across a series of books and manuals that cover just about every topic you can think of about the RV world and decided that I better show it to you so you could have a chance to see what's available.

There's the link; RV101

These are ebooks that you can purchase online and download immediately. We earn percentage of whatever you buy so we hope you find the information to your liking and that it is useful.

Thanks for reading, I hope you find the information useful.

Thursday, October 21, 2010

RV Maintenance Tips - Unwanted Guests

We had an unwanted guest in our rig a few days ago. We're still working on the mess and damages. This guest was in the form of a rodent, actually a large rat, that had climbed up the rear stabilizers and attempted to take up residency inside the rear bumper of our Montana. We first became aware of the little monster at night as it rummaged around. It was pulling insulation out of the walls and piling it into a nest. It also chewed the probe wires off the fresh water tank.

I put a few baits in the bumper and waited about three days before taking the bottom cover out from under the trailer to look around. It was ugly! To get to the area I needed to remove the rear stabilizers and back out all the bolts and screws that hold the bottom cover in place. I placed a heavy outdoor carpet on the ground under the rig to lay on before doing this. It helps save your back from the rocks and makes it easy to find screws and tools when you drop them.

Once I had all the bolts and screws out, I pulled the cover and the foiled bubble wrap insulation from under the water tank dropped down. It was covered with rat droppings, bits of insulation, and urine. The urine was bloody from the baits. It smelled really bad. There were also three mysterious four inch pieces of tiny wire laying together on the insulation among all the mess.

Rather than attempt to clean the insulation I simply cut it off and stuffed it in a double garbage bag. I used a trash picker to pull the nest of fiberglass insulation out of the bumper. It filled a five gallon bucket. Next I use a water hose and nozzle and sprayed the rest of the droppings and whatever out of the bumper, then sprayed it again with disinfectant. I decided to leave the bottom of the rig open for a few days while I figured out what all needed to be done to repair everything. It needed airing out pretty badly anyway.

One problem I had was figuring out where those loose wires were from. I needed to know what needed to be repaired before I put the rig back together. I checked all the trailer lights inside and out, stereo speakers who's wires pass through that area, the air conditioner, and everything else I could think of but they all worked. I was about to put the bottom under the rig when I saw that the wires to the probes on the fresh water tank had all been clipped off. My experience with rodents in RV's is that they always chew wires someplace and this was it. Since I had ordered a new water heater element from the local RV repair shop that morning, I called them to see if they could add a probe wire kit. No problem! It would only cost $8.00 bucks too. So I left the bottom open a couple more days while I waited for the parts. This gave me a chance to go to the local hardware and lumber supply store and pick up some replacement bubble wrap insulation too. It cost me three dollars a foot for the wide stuff, which is about four feet, and I bought eight feet of it. I really only needed about five and a half  or six but I hadn't measured and I knew my rig was about eight feet wide.

A couple of days later my probe wires and water heater element came in and I was back in business. I also found some used house insulation at my dads house that had been saved in bags and I use it to replace what had been pulled out and ruined by the critters. Altogether I needed about ten feet of regular fiberglass wall  insulation to fill the hole. It took me a few minutes to replace the probe wires and test it, then another half hour or so to put all the other parts back in place. It would have been easier to handle the bottom cover if a helper was available but I managed it alone. I filled the access holes that I could find with expanding foam and hope it prevents more problems in the future. My next project is replacing the anode rod and electric heating element. Read the next post for that little adventure.

I recently came across a series of books and manuals that cover just about every topic you can think of about the RV world and decided that I better show it to you so you could have a chance to see what's available.

There's the link; RV101

These are ebooks that you can purchase online and download immediately, and yes we earn a stipend from them if you choose to buy.


Thanks for reading, I hope you find the information useful.
Tuesday, October 19, 2010

RV Maintenance Tips - The Water Heater

RV water heaters don't really need much attention. Typically all you need to do is change the anode rod every couple of years and clean the gunk out of the bottom of the tank at the same time. I have been putting off this task for remove the anode rod.

I finally remembered to buy a socket that will fit and commenced changing the anode rod as soon as I had a chance. I should have done this two or three years ago. We've had this rig for five years next month and I haven't done it before now. The original rod was completely gone and calcium deposits covered the core over it's full length. I also noticed that the last of the water that drained from the tank was full of chunks of calcium and other sediment. I sprayed water into the tank through the drain hole with my hose nozzle until the bottom of the tank was clean. I looked in with a flash light to see and it looked good.

About that time I noticed the reflection of something red inside the tank and it was then that I realized that I had forgotten to turn off the electric element. Normally this will cause a circuit breaker to pop, or the high temp thermostat reset to activate. It didn't in my case. It just took out the element. I have a new one ordered and it will cost about $25 dollars from the local RV dealer.

I actually ordered the part yesterday morning and was informed that the part would be in today about 10:00 AM. I called to check on it at 1:30 PM and was informed that the parts delivery is coming by truck. I don't know how the parts are usually delivered but evidently this is unusual. Anyway they don't expect the parts delivery until about 5:00 PM. I guess I'll check on it again tomorrow.

Both new and experienced RV'rs are always looking for new ideas and other RV Tips about their favorite lifestyle. We are not exceptions to this rule and we have been living full time in our RV since 2003.

I recently came across a series of books and manuals that cover just about every topic you can think of about the RV world and decided that I better show it to you so you could have a chance to see what's available.

There's the link; RV101

These are ebooks that you can purchase online and download immediately, and yes we earn a stipend from them if you choose to buy.


Thanks for reading, I hope you find the information useful.

Tuesday, October 12, 2010

RV Tips - Where to find information

Both new and experienced RV'rs are always looking for new ideas and other RV Tips about their favorite lifestyle. We are not exceptions to this rule and we have been living full time in our RV since 2003.

I recently came across a series of books and manuals that cover just about every topic you can think of about the RV world and decided that I better show it to you so you could have a chance to see what's available.

There's the link; RV101

These are ebooks that you can purchase online and download immediately, and yes we earn a stipend from them if you choose to buy.

RV Maintenance Tips - Preparing for Winter on the Coast

We've decided to spend the next three months working as campground hosts right next to the Pacific Ocean. Having lived or worked near the ocean most of my life I know what can happen to metal objects when subjected to salt air. Constant rv maintenance as well vehicle maintenance is a must.

The biggest enemy in this environment is rust. In order to keep my rig looking good and working properly I will need to perform diligent rv maintenance and cleaning while we are here. The first thing I did was to give all the hydrolic arms that push my slides out a coat of WD-40. I'll do this every couple of weeks while we are here and check it more often than that. I also coated my lug nuts on the trailer as well. My next project will be to keep the vehicle clean. I use a regular vehicle car wash with wax. This helps keep moisture off and regular washing prevents the green slime or moss buildup that will happen in wet climates. Again everything needs washed at least once a month or better yet, every two weeks.

If you are new to RVing, here's a link to some great starter books about the RV lifestyle. RV101

Thursday, May 20, 2010

One is not Enough

Ever wonder if you ought to own more than one RV? For most folks having more than one RV is not an option, they really don't need more than one because of their lifestyle, financial situation or maybe because they don't have a place to keep an extra rig.

We,on the other hand, are fortunate enough to have two fifth wheel trailers. We didn't really set out to own a fleet of these rigs when we became full time RV'rs but it sort of happened anyway. It's really lucky for us that it did too. Last year we had moved our big Montana over to the Oregon Coast for the Fall and holiday seasons. I don't recall why but we had decided not to travel south for the winter and stayed on longer than normal. At one point in early March we decided to travel to eastern Oregon to see our grand kids (and their parents) for the weekend. It was supposed to be a quick trip.

As we got close to our destination a sudden snow storm popped up, and the extreme cold combined with heavy snowfall overcame the application of de-icer that had been applied to the highway. Our truck went into a slide on a corner and ended up flipping onto its passenger side. We were going slow and were not injured but the truck had extensive body damage. It took seven weeks to have it repaired locally. Fortunately we were at our daughter's and this is were we store our smaller fifth-wheel. We stayed in this little rig the whole time and had an wonderful extended visit with our grand sons. At the time we felt that the world was leaning sort of hard against us but as I look back now it was all for the good.

At the present we are again staying in our little fifth wheel because of other repairs. This time we are having the roof on our Montana replaced. That's another story so won't add details now. We delivered the Montana to the repair shop (Curt's RV Repair, in Island City Oregon) on Monday, and Curt says we can have it back tomorrow which is Friday. In the meantime we simply put our little rig in the park space we normally use. When the big Montana is ready we will move the little one and so on.

Our small trailer isn't an expensive one. It's 17 years old and has it's problems (leaks like a sieve) but it still gives us shelter and a place to stay without depending on family or having to make other special arrangements. One of these days well use it as a trade-in on another little RV but for now this one is just what we need. At 29 feet it is big enough to take the kids on extended camping trips or to hunting camp, but not too big to use in the older, smaller and sometimes remote campgrounds. The kids can pull it if they get time to have a vacation and maybe even join us from time to time if they take the notion. When stored the little rig  becomes an extra bedroom for visitors because it is so easy to set up for use, even when winterized. We just turn on the furnace, but not the water. Its warm and dry and gives grand parents or even great grand parents a place of their own for napping and "getting away" when visiting the kids.

Well I think I've made my point about have more than one RV. In our case it's great and has been very handy indeed. You don't need a new one, just something that is clean, warm and usable.

Thursday, May 6, 2010

Campground Hosting

If you are interested in becoming a campground host in Oregon here's a great link to help get you started.http://www.oregon.gov/OPRD/VOL/volunteer-hostdesc.shtml#Hosting_Overview This takes you to the Hosting Overview page for Oregon Parks and Recreation. It's the best place to get information about hosting at Oregon's parks and will help you get started.

The process is actually fairly easy. All you need to do is download the online application, fill it out and send it in to the place they want you to send it. During the process you will list the areas you would like to work along with the kind of work you like or are best suited for. Once you have been accepted as a host you will be given training as to your duties and other important things park hosts need to know about. This includes how you handle various situations, (rangers do the enforcement, not volunteer hosts, OK!) or operate various pieces of equipment and so on. Oregon does background checks on all it's employees so you should expect that. I like this idea for obvious reasons.

Deb and I have worked in a number of campgrounds in the past and we enjoyed both our duties and the friendships we have made with other hosts and the park rangers. These have been long lasting relationships and we always look forward to seeing our old host friends again. Some of the parks we have worked in include, Nehalem Bay State Park, Manhatten Beach Wayside, Ecola State Park, Milo McIver State park, Catherine Creek State Park, and Wallowa Lake State Park. Each park had different duties for us to perform so our experience is varied. Our last volunteer duty station was Fort Vancouver Natl. Park. This was a wonderful experience in a wonderful park.

Deb and I don't continuously work as park hosts all the time and only take those jobs as our situation dictates. Sometimes we want to and sometimes we don't. We let "things" help us decide. If you want more information about campground hosting please send us a note or comment and we will be happy to contact you and answer your questions as best we can.

One thing I will recommend is that you should visit the campground you think you want to volunteer in ahead of time if possible. Try to visit with the local host coordinator and leave a copy of your application with them, along with a resumes. This has to be a copy of the same one you sent to Salem, and you have to send one to Salem. You can't just hand an application to the host coordinator and not send one to Salem. Clear on that? That way when the coordinator is looking for someone from the list they will have your faces to go with your applications. You also need to get started early. These positons go quickly, especially in the popular parks so plan ahead. It can take years to get into some parks, because the old hosts always have first refusal to return or not.

Hope this is helpful!

Friday, February 12, 2010

Solar Panel mounting

We use a two panel solar system to help us with our electrical needs when boon docking. Would I like more panels? Yes I would! But I don't really need them. My panels provide 260 watts of power at 22 volts and at 7 amps the way I have them configured.

The purpose of this post is to discuss my mounting system however so I will leave off with the technical stuff.

You see all kinds of systems on other rigs. What is important is what works for you. We chose not to mount our panels on top of our rig because we actually have two trailers. We have a smaller one that we use in the summer for quick fishing or photography trips to the mountains where we don't want to take our big Montana. The solar panels go along on those trips to help with the piece and quiet that you don't get with a generator. Even if it is a Honda! (I have an EU2000 for cloudy days or night time power needs)

If you look closely at my mounting system you'll note that it is simply a metal rack of several different parts to help brace it and hold the panels at an angle to the sun. This can be steep or not so steep depending on the suns height. The sun is higher in the summer than in winter and I can take advantage of that. Especially in timbered campgrounds where the sun may be difficult to see until midday.


Some of my parts came from the solar panel dealer, some came from Home Depot, and most recently, I found some laying along the highway. More on that later.

My mounting system is totally portable and can be carried inside a capped section of 4" PVC pipe five to six feet in length. It takes from ten minutes to a half hour to assemble depending on how long it's been since I last used it. Sometimes I forget how the parts go and have to figure it out again. That's when it takes a little longer. It was all built to match the existing holes in the solar panels.

One advantage to having a portable solar panel system is that you don't have to worry about which way to face your rig. Trailers and motor homes with panels mounted rigidly to the roof have to point their rigs the same direction all the time. I find that I want to point my rig different directions based on the view or the wind and so on. One disadvantage to a portable solar panel system is that it is more susceptible to theft or damage or unleashed dogs and the like because it is so close the ground. Much care must be taken when in RV parks to avoid objects thrown from lawn mowers, truck or car tires, and weed eaters to name a few.

I tend to re-point my panels at the sun during the day to keep them at peak power. Especially if I have the inverter on so I can have my satellite internet system up as I do now while posting this blog. Until recently I didn't have any wheels on which to do this. I had just made up my mind to buy a set for this purpose when we were driving along the highway a few days ago and I spotted a set of wheels from somebody's BBQ in the ditch. They had to have blown out of a rig with the BBQ and broken off. I stopped and tossed them in my truck for my panels. They are a little light for my use but as you can see in the picture they are just what I needed.

Wednesday, February 3, 2010

This is my "water transfer system" for boondocking. The pump came from a Harbor Freight store and cost about $20 bucks. I could have used a regular "surflo" pump if I had one but they cost at least $50 bucks for reconditioned units.

This pump uses 12volt power and is perfect for my use. To make it work I ran a long positive lead all the way from my battery to the back of my trailer and installed an outdoor 12volt receptacle. I put a male plug on the pump leads to fit the receptacle and installed an on and off switch in the positive side. The ground side went to a handy screw in the frame of the trailer.

Now I just back my truck up to the pump and connect a primed hose from the water bag to the pump. Flip the switch and in about 10 minutes my rig is full of water and I'm ready for a refeshement!

The mount under the pump is a scrap piece of 2x4, with a hole in the bottom that allows the pipe from a television tripod to be inserted rather snugly. I just set my TV tripod next to the trailer and the pump on top. It's the perfect height. The pump will work while positioned on the ground though so you don't really need it. I just like to have things at a handy height if possible.

I'll show you the water bag connection in another blog.